Android Things
Android Things 终于登场了:
来看看内部核心硬件:
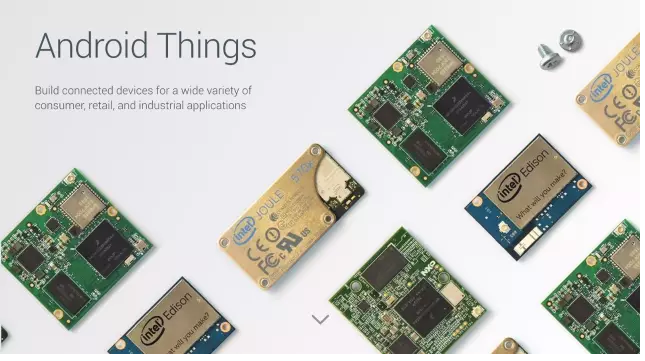
它的愿景就是将无数的的设备连接起来,Android Things 作为物联网的大脑,使用公开协议 Weave (官网,Android官网介绍,GitHub)与广大的传感器/外部设备进行对话。
不像 Android 其它系统,Android Things 大多数情况下只在后台以服务方式运行,没有显示屏,默默的与打印机、门锁、烤箱、灯泡、插座这些设备一起提供服务。
Android Things 全解析
1、Android Things 架构
先看 Brillo 和 Android Things 的架构图进行对比:
这是 Brillo:

这是 Android Things:

可以很清楚的看出来:
1)Brillo 使用 C/C++ 基于 NDK 进行开发,Android Things 通过 Java API 面向广大的 Android 和 Java 开发者,就算是新手,Android 的也是极易上手的。各位苦于嵌入式开发各种工具坑的福音到了,对于性能和底层要求高的部分仍然可以用 NDK 编写,在 Android Studio 里调试 NDK 代码也和 Java 代码一样的简单。
2)Android Studio,Android SDK,Play service 和 Firebase,这些工具和 Service 形成了完整易用的工具链。
3)Android Things 出生最晚,更新条件也是最好的,直接使用 Android Nougat 的自动后台更新机制,最大限度的提高系统的安全性。
2、现在支持以下几款硬件:
1)Intel Edison: https://developer.android.com/things/hardware/edison-arduino-io.html
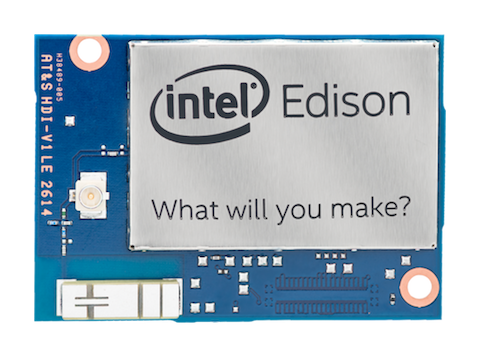
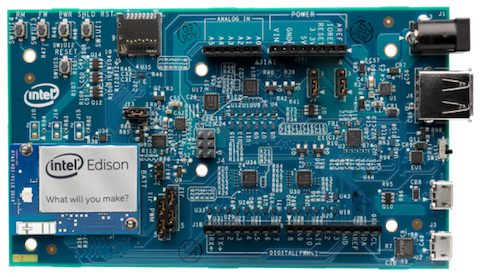
The Intel® Edison compute module includes a dual-core x86 CPU running at 500 MHz, a 100Mhz MCU, 1GB of memory, 4GB of eMMC storage, dual-band Wi-Fi and Bluetooth 4.0.
Learn More Get Started with Edison
2)NXP Pico i.MX6UL : https://developer.android.com/things/hardware/pico.html
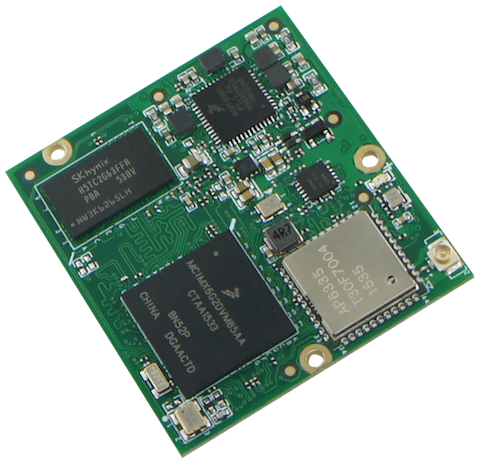
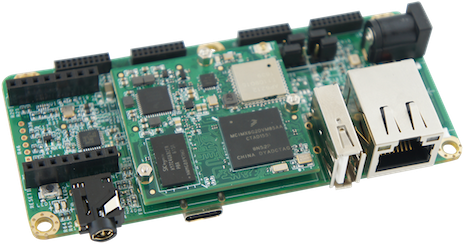
The Pico SoM provides an ARM® Cortex-A7 Core, 512MB of memory, 4GB of eMMC storage, Ethernet, wireless networking and Bluetooth 4.
Learn More Get Started with Pico
3)Raspberry Pi 3 : https://developer.android.com/things/hardware/raspberrypi.html

Raspberry Pi 3 Model B provides a quad-core 64-bit ARM Cortex-A53 CPU running at 1.2GHz, 512MB of memory, SD card storage, 400 MHz GPU, Ethernet and wireless networking, Bluetooth 4.1, HDMI and DSI display interfaces.
Learn More Get Started with Raspberry Pi
4)Intel® Joule™ 570x
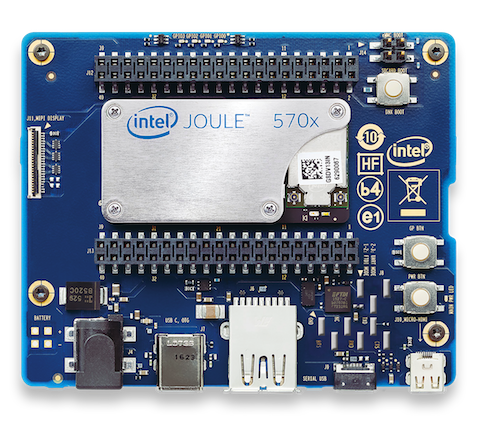
Intel® Joule™ provides a 64-bit quad-core Intel® Atom™ processor clocked at 1.5 GHz, 4GB of memory, between 8GB and 16GB on storage, 450 MHz GPU, dual band wireless networking and Bluetooth 4.2.
Coming Soon!
5)NXP Argon i.MX6UL
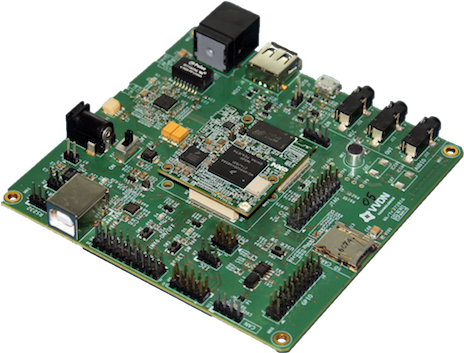
The Argon SoM provides a ARM® Cortex®-A7 Core, 512MB of memory, 4GB of storage, wireless networking and Bluetooth 4.1.
Coming Soon!
Where to buy
You can purchase supported developer kits designed to work with the Android Things code samples from the following distributors.
1)Adafruit Project Kit :: https://www.adafruit.com/androidthings
2)Pimoroni Rainbow HAT ::http://pimoroni.com/androidthings
3)Sparkfun Project Kit ::https://www.sparkfun.com/androidthings
Hello Android Things
买到的开发版都是没有装操作系统系统的,第一步先把 Android Things 刷到板子里。
Flash image (刷机):
以Intel Edison为例:
1).Android SDK Platform Tools 25.0.3以上,fastboot 工具添加到 PATH 环境变量中,以便从任意目录运行。
2). 下载后打Intel Flash Tool(下载地址:https://01.org/zh/android-ia/downloads/intel-platform-flash-tool-lite?langredirect=1),加打开下载好的对应刷机包(下载地址:https://developer.android.com/things/preview/download.html)。

3)、 使用 USB 线链接 Edison,如果 Edison 没有显示,换 USB 口和线试试。
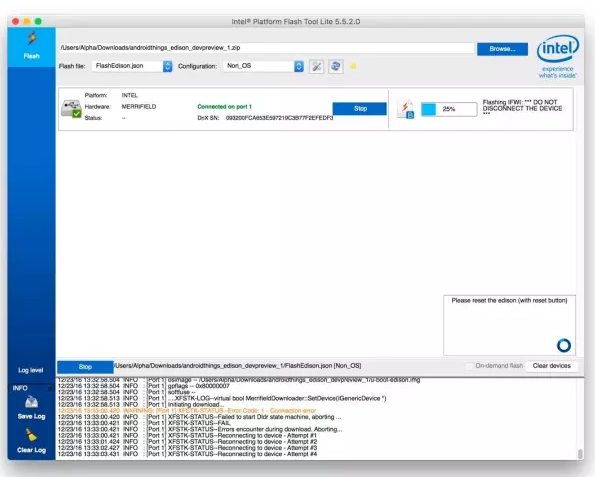
4)、Start to Flash(开始刷机)
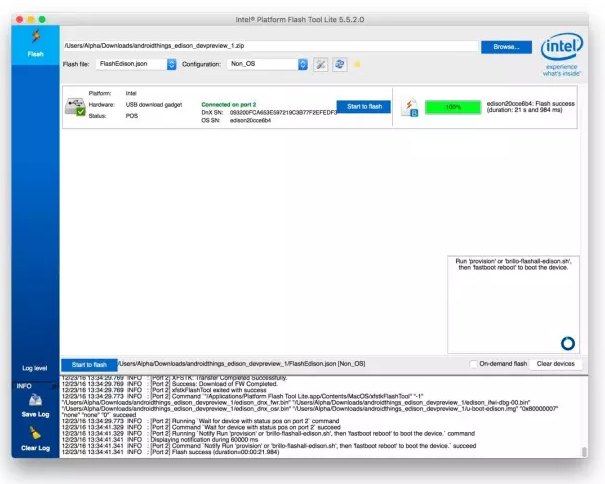
5)使用 Fastboot 刷入系统镜像,此时需要几十秒,光 System.img 就有 500 多M。


6)刷入 Google Service 镜像。

7)刷入 OEM 镜像。

8)重启。
fastboot reboot
9)验证系统状态。
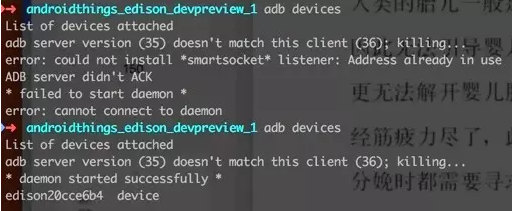
如果出现以下 Error,把 Intel Flash Tool 关掉,重新连接下 USB。

Connecting Wi-Fi
To connect your board to Wi-Fi using adb:
1) adb 命令和服务启动参数
$ adb shell am startservice \
    -n com.google.wifisetup/.WifiSetupService \
    -a WifiSetupService.Connect \
    -e ssid <Network_SSID> \
    -e passphrase <Network_Passcode>
2)用 logcat 查看网络状态
$ adb logcat -d | grep Wifi
...
V WifiWatcher: Network state changed to CONNECTED
V WifiWatcher: SSID changed: ...
I WifiConfigurator: Successfully connected to ...
3)Ping 检测
$ adb shell ping 8.8.8.8
PING 8.8.8.8 (8.8.8.8) 56(84) bytes of data.
64 bytes from 8.8.8.8: icmp_seq=1 ttl=57 time=6.67 ms
64 bytes from 8.8.8.8: icmp_seq=2 ttl=57 time=55.5 ms
64 bytes from 8.8.8.8: icmp_seq=3 ttl=57 time=23.0 ms
64 bytes from 8.8.8.8: icmp_seq=4 ttl=57 time=245 ms
Hello Android Things 项目
1、Android Studio 中新建项目。
1)Update your SDK tools to version 24 or higher
2)Update your SDK with Android 7.0 (API 24) or higher
3)Create or update your app project
2、在 build.gralde 中添加依赖 com.google.android.things:androidthings
apply plugin: 'com.android.application'
android {
    compileSdkVersion 25
    buildToolsVersion "25.0.2"
    defaultConfig {
        applicationId "com.geekdev.alpha.androidthings"
        minSdkVersion 24
        targetSdkVersion 25
        versionCode 1
        versionName "1.0"
        testInstrumentationRunner "android.support.test.runner.AndroidJUnitRunner"

    }
    buildTypes {
        release {
            minifyEnabled false
            proguardFiles getDefaultProguardFile('proguard-android.txt'), 'proguard-rules.pro'        }
    }
}
dependencies {
    compile fileTree(dir: 'libs', include: ['*.jar'])
    androidTestCompile('com.android.support.test.espresso:espresso-core:2.2.2', {        exclude group: 'com.android.support', module: 'support-annotations'    })
    provided 'com.google.android.things:androidthings:0.1-devpreview'
    compile 'com.android.support:appcompat-v7:25.1.0'
    testCompile 'junit:junit:4.12'
}
注意:此处依赖方式是 provided,让 Android Things 使用系统中的库。
3、Add the things shared library entry to your app's manifest file:
<application ...>
    <uses-library android:name="com.google.android.things"/>
    ...
</application>
4、添加activity
<application
    android:label="@string/app_name">
    <uses-library android:name="com.google.android.things"/>
    <activity android:name=".MainActivity">
        <!-- Launch activity as default from Android Studio -->
        <intent-filter>
            <action android:name="android.intent.action.MAIN"/>
            <category android:name="android.intent.category.LAUNCHER"/>
        </intent-filter>

        <!-- Launch activity automatically on boot -->
        <intent-filter>
            <action android:name="android.intent.action.MAIN"/>
            <category android:name="android.intent.category.IOT_LAUNCHER"/>
            <category android:name="android.intent.category.DEFAULT"/>
        </intent-filter>
    </activity>
</application>
5、在 Activity 中输入 Hello World
public class MianActivity extends Activity {
    private static final String TAG = MainActivity.class.getSimpleName();;

    @Override
    protected void onCreate(Bundle savedInstanceState) {
        super.onCreate(savedInstanceState);

        PeripheralManagerService service = new PeripheralManagerService();
        Log.d(TAG, "Available GPIO: " + service.getGpioList());
    }
}6、运行输出
在 logcat 窗口中看到结果了。
Peripheral I/O
不满足于 Hello Android Things,继续来使用 Android Things 对外设进行操作。
public class MainActivity extends Activity {

    private static final String TAG = MainActivity.class.getSimpleName();


    private Gpio mLedGpio;
    private ButtonInputDriver mButtonInputDriver;

    @Override
    protected void onCreate(Bundle savedInstanceState) {
        super.onCreate(savedInstanceState);
        Log.d(TAG, "Hello Android Things!");
        Log.i(TAG, "Starting ButtonActivity");

        PeripheralManagerService pioService = new PeripheralManagerService();
        try {
            Log.i(TAG, "Configuring GPIO pins");
            mLedGpio = pioService.openGpio(BoardDefaults.getGPIOForLED());
            mLedGpio.setDirection(Gpio.DIRECTION_OUT_INITIALLY_LOW);

            Log.i(TAG, "Registering button driver");
            // Initialize and register the InputDriver that will emit SPACE key events
            // on GPIO state changes.
            mButtonInputDriver = new ButtonInputDriver(
                    BoardDefaults.getGPIOForButton(),
                    Button.LogicState.PRESSED_WHEN_LOW,
                    KeyEvent.KEYCODE_SPACE);
            mButtonInputDriver.register();
        } catch (IOException e) {
            Log.e(TAG, "Error configuring GPIO pins", e);
        }
    }

    @Override
    public boolean onKeyDown(int keyCode, KeyEvent event) {
        if (keyCode == KeyEvent.KEYCODE_SPACE) {
            // Turn on the LED
            setLedValue(true);
            return true;
        }

        return super.onKeyDown(keyCode, event);
    }

    @Override
    public boolean onKeyUp(int keyCode, KeyEvent event) {
        if (keyCode == KeyEvent.KEYCODE_SPACE) {
            // Turn off the LED
            setLedValue(false);
            return true;
        }

        return super.onKeyUp(keyCode, event);
    }

    /**
     * Update the value of the LED output.
     */
    private void setLedValue(boolean value) {
        try {
            mLedGpio.setValue(value);
        } catch (IOException e) {
            Log.e(TAG, "Error updating GPIO value", e);
        }
    }

    @Override
    protected void onDestroy() {
        super.onDestroy();

        if (mButtonInputDriver != null) {
            mButtonInputDriver.unregister();
            try {
                mButtonInputDriver.close();
            } catch (IOException e) {
                Log.e(TAG, "Error closing Button driver", e);
            } finally {
                mButtonInputDriver = null;
            }
        }

        if (mLedGpio != null) {
            try {
                mLedGpio.close();
            } catch (IOException e) {
                Log.e(TAG, "Error closing LED GPIO", e);
            } finally {
                mLedGpio = null;
            }
            mLedGpio = null;
        }
    }
}
使用 Button driver 对 LED 灯进行开关操作。
public class BoardDefaults {
    private static final String DEVICE_EDISON_ARDUINO = "edison_arduino";
    private static final String DEVICE_EDISON = "edison";
    private static final String DEVICE_RPI3 = "rpi3";
    private static final String DEVICE_NXP = "imx6ul";
    private static String sBoardVariant = "";

    /**
     * Return the GPIO pin that the LED is connected on.
     * For example, on Intel Edison Arduino breakout, pin "IO13" is connected to an onboard LED
     * that turns on when the GPIO pin is HIGH, and off when low.
     */
    public static String getGPIOForLED() {
        switch (getBoardVariant()) {
            case DEVICE_EDISON_ARDUINO:
                return "IO13";
            case DEVICE_EDISON:
                return "GP45";
            case DEVICE_RPI3:
                return "BCM6";
            case DEVICE_NXP:
                return "GPIO4_IO21";
            default:
                throw new IllegalStateException("Unknown Build.DEVICE " + Build.DEVICE);
        }
    }

    /**
     * Return the GPIO pin that the Button is connected on.
     */
    public static String getGPIOForButton() {
        switch (getBoardVariant()) {
            case DEVICE_EDISON_ARDUINO:
                return "IO12";
            case DEVICE_EDISON:
                return "GP44";
            case DEVICE_RPI3:
                return "BCM21";
            case DEVICE_NXP:
                return "GPIO4_IO20";
            default:
                throw new IllegalStateException("Unknown Build.DEVICE " + Build.DEVICE);
        }
    }

    private static String getBoardVariant() {
        if (!sBoardVariant.isEmpty()) {
            return sBoardVariant;
        }
        sBoardVariant = Build.DEVICE;
        // For the edison check the pin prefix
        // to always return Edison Breakout pin name when applicable.
        if (sBoardVariant.equals(DEVICE_EDISON)) {
            PeripheralManagerService pioService = new PeripheralManagerService();
            List<String> gpioList = pioService.getGpioList();
            if (gpioList.size() != 0) {
                String pin = gpioList.get(0);
                if (pin.startsWith("IO")) {
                    sBoardVariant = DEVICE_EDISON_ARDUINO;
                }
            }
        }
        return sBoardVariant;
    }
}
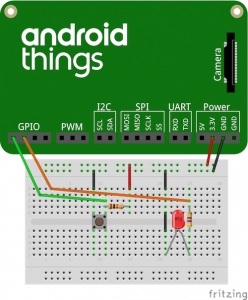
运行到如下的 Raspberry Pi 3 中,使用按钮来控制 LED 灯。

文章评论
It's a pity you don't have a donate button! I'd definitely donate to this excellent blog!
I guess for now i'll settle for book-marking and adding your RSS feed to my Google account.
I look forward to new updates and will share this blog with my Facebook group.
Chat soon!